Windows
Here you'll find instructions for manually installing evcc on Windows.
This manual installation requires advanced PC knowledge, especially when working with the Command Prompt or PowerShell.
Running evcc on Windows is possible. However, evcc is typically used in a Linux environment (e.g., Raspberry Pi).
Installation
- Download the appropriate file for your system
- 64-Bit Intel CPU: evcc_X.XX_windows_amd64.zip
- Extract the downloaded file (e.g., by double-clicking)
- You'll now have a new folder containing the
evccprogram - Open Command Prompt and navigate to the folder containing the
evccprogram - Test the installation with the following command:
evcc -v
- You should see the current version of evcc (e.g.,
evcc version 0.xxx.y).
Configuration
evcc can be configured in two ways:
Web Interface (recommended)
Start evcc without any additional parameters:
./evcc
Then open your browser at http://localhost:7070:
- You'll be prompted to set an administrator password
- You can then configure your devices directly via the web interface
- Settings are automatically saved in the database
Configuration File (traditional)
Alternatively, you can use an evcc.yaml configuration file.
See Configuration for details on creating the configuration file.
Start evcc with:
./evcc -c evcc.yaml
Update/Downgrade
Follow the steps above and replace the evcc program file with the new or previous version. The configuration does not need to be redone.
Background Service
Task Scheduler
This documentation assumes that evcc is located in c:\evcc.
These instructions were created using Windows 10.
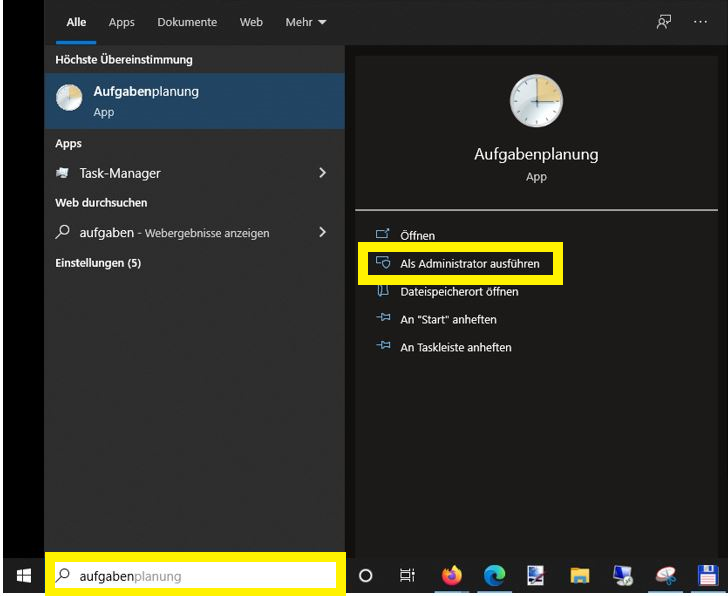
- Open the start menu and search for "Task Scheduler", then right-click it and choose "Run as administrator":
- Once you've started Task Scheduler, choose whether to create the new service in its own folder or in the general Task Scheduler Library.
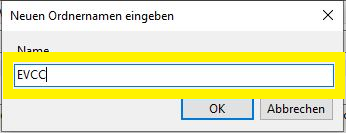
In this example, we create a dedicated
evccfolder. Select "Task Scheduler Library", then right-click to open the context menu and choose "New Folder...":
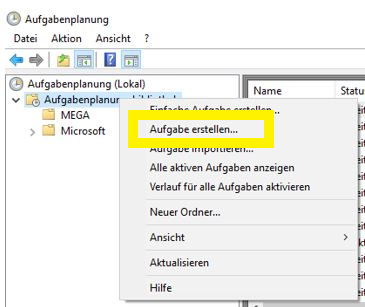
- Now select the new
evccfolder and open the context menu again. Choose "Create Task":
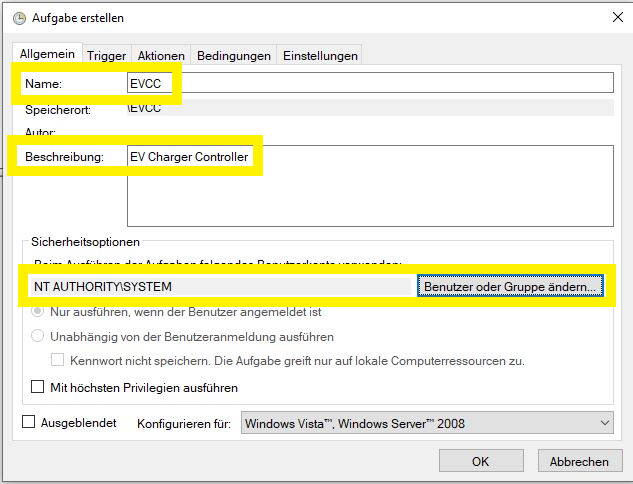
- Give the task a name (e.g. "evcc") and a short description.
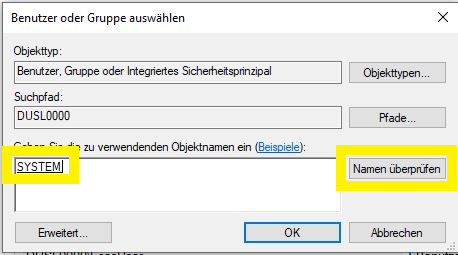
Since we need to run as a system service, open user management via "Change User or Group" and enter
SYSTEMin the box. Click "Check Names" — the word "SYSTEM" should be underscored. Click OK to close the dialog:
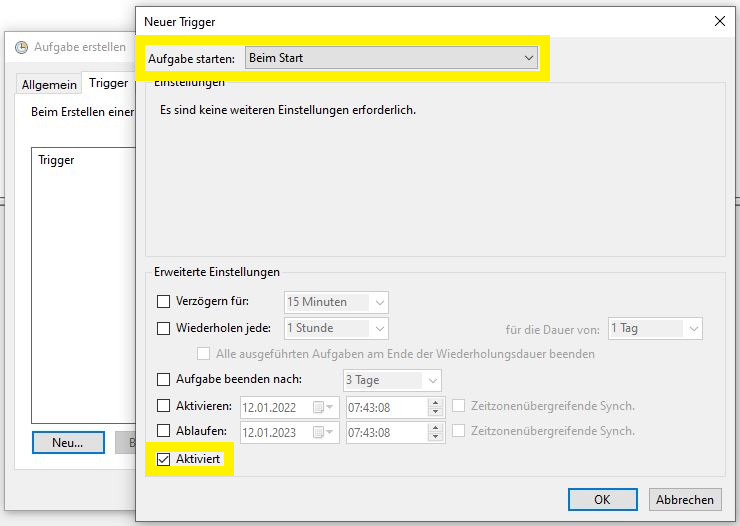
- In the "Triggers" tab, click "New...". Set the trigger to "At Startup" and check that the "Enabled" checkbox is ticked:
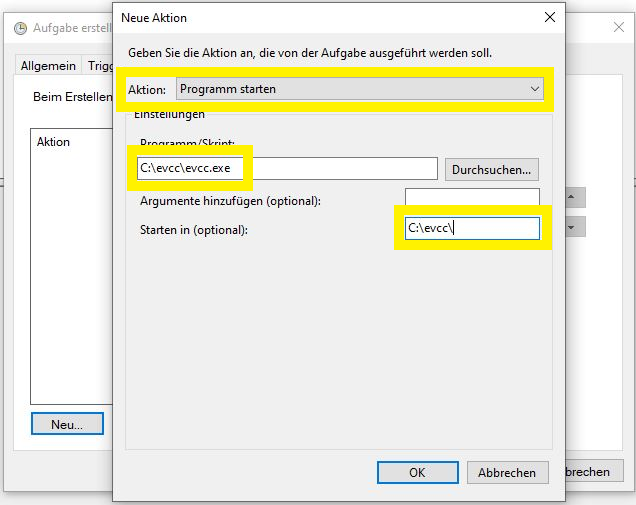
- In the "Actions" tab, click "New".
Make sure "Start a Program" is selected, then find your
evcc.exeexecutable using the Browse option. It is recommended to also set the path in the "Start in" box so that the configuration file is found automatically:
-
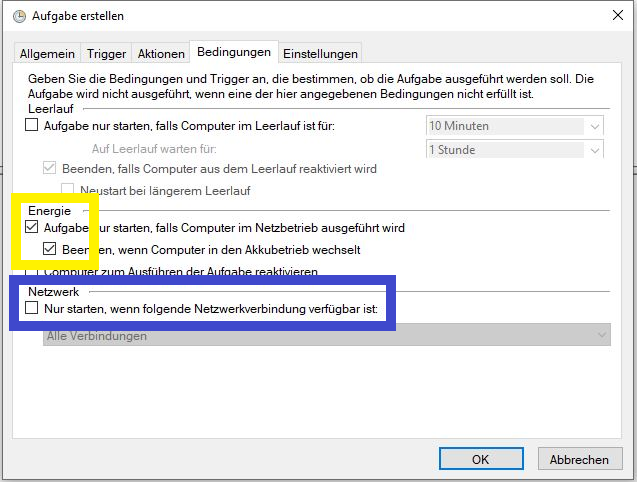
In the "Conditions" tab, the default settings can be left as-is.
infoSMA Home Manager can sometimes have issues when used with Wi-Fi — try enabling the "Network" condition and selecting the appropriate connection interface in the dropdown.
- In the "Settings" tab, make sure to select "Run task as soon as possible after a scheduled start is missed". Also make sure "Stop the task if it runs longer than:" is not selected — otherwise evcc will randomly stop running.

The task can now be started manually or tested with a reboot.
To check it's working, navigate to http://localhost:7070 in your browser.
NSSM
This documentation assumes that evcc is located in c:\Tools\evcc.
These instructions were created using Windows 11.
As an alternative to Task Scheduler, you can run evcc as a Windows service. A service runs without user login and offers better control over restart behaviour and error handling.
Since evcc does not natively support the Windows service interface, nssm (Non-Sucking Service Manager) can be used as a service wrapper.
-
Download nssm from nssm.cc and extract the ZIP file to
C:\Tools\nssm\. -
Open a command prompt (
cmd.exe) and change to thewin64folder:cd /D C:\Tools\nssm\nssm-2.24\win64 -
Install the service:
nssm install evcc -
Go through the tabs of the dialog. The following settings are recommendations.
-
Application:

- Path: Path to
evcc.exe. - Start directory: Working directory for evcc.
- Arguments: Parameters for evcc, e.g.
-c evcc.yaml. Optional:--database evcc.dbto explicitly set the database path. Without this option, the database is stored in the executing account's user profile. Under the System account, that would be%SystemRoot%\system32\config\systemprofile\.evcc\evcc.db— a different location than when starting interactively. With--databaseyou ensure the same database is always used. This is relevant when resetting the password.
- Path: Path to
-
Details:

- Display Name: Name of the service in Windows Services (ideally the same as Service Name).
- Startup type: Automatic for auto-start on boot.
-
Log on:

Default: service runs under the System account. Details: nssm documentation.
importantThe account chosen here determines where evcc stores its database
evcc.db(see Arguments above). -
Dependencies:

Adding
NlaSvcas a dependency ensures the network is ready before evcc starts. -
Process:

Keep defaults.
-
Shutdown:

Keep defaults. nssm first tries
Ctrl+C, thenWM_CLOSE/WM_QUIT, and forcefully terminates the process after timeout. -
Exit actions:
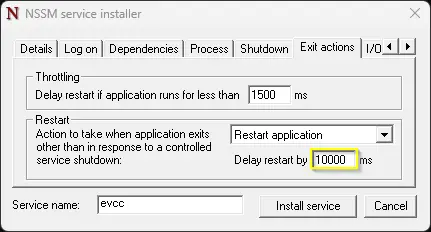
Recommendation: Restart application with 10 second delay, so evcc automatically restarts after a crash or restart via the web UI.
-
I/O:

Optional: redirect
stdoutandstderrto log files. Keep evcc's log level low to avoid the files growing too quickly. -
File rotation:
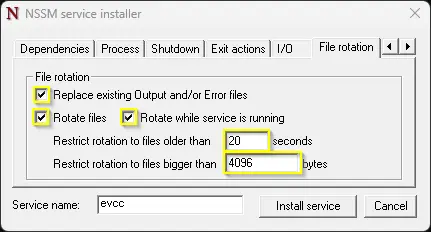
Optional: enable log rotation to limit log file sizes.
-
Environment:

Keep defaults.
-
Click Install Service to set up the service.
The service can then be started and stopped via the Windows Services management console.
To verify, navigate to http://localhost:7070 in your browser.